How to add KOYN token to Anchor
This page explains how to add the KOYN token to your Anchor wallet, a vital step for users looking to manage or transact with the KOYN token within the Anchor platform.
Prerequisites
Before you complete on the steps below, ensure you have already integrated KOY Network as a Blockchain with Anchor, and added an account to the Blockchain.
Add KOYN token: Step-by-Step
Step 1: Manage Tracked Tokens
Ensure you're connected to the KOY Mainnet or Testnet. From the left-side menu, click on Tools and then select Manage Tracked Tokens to begin the process of adding the KOYN token to your wallet.
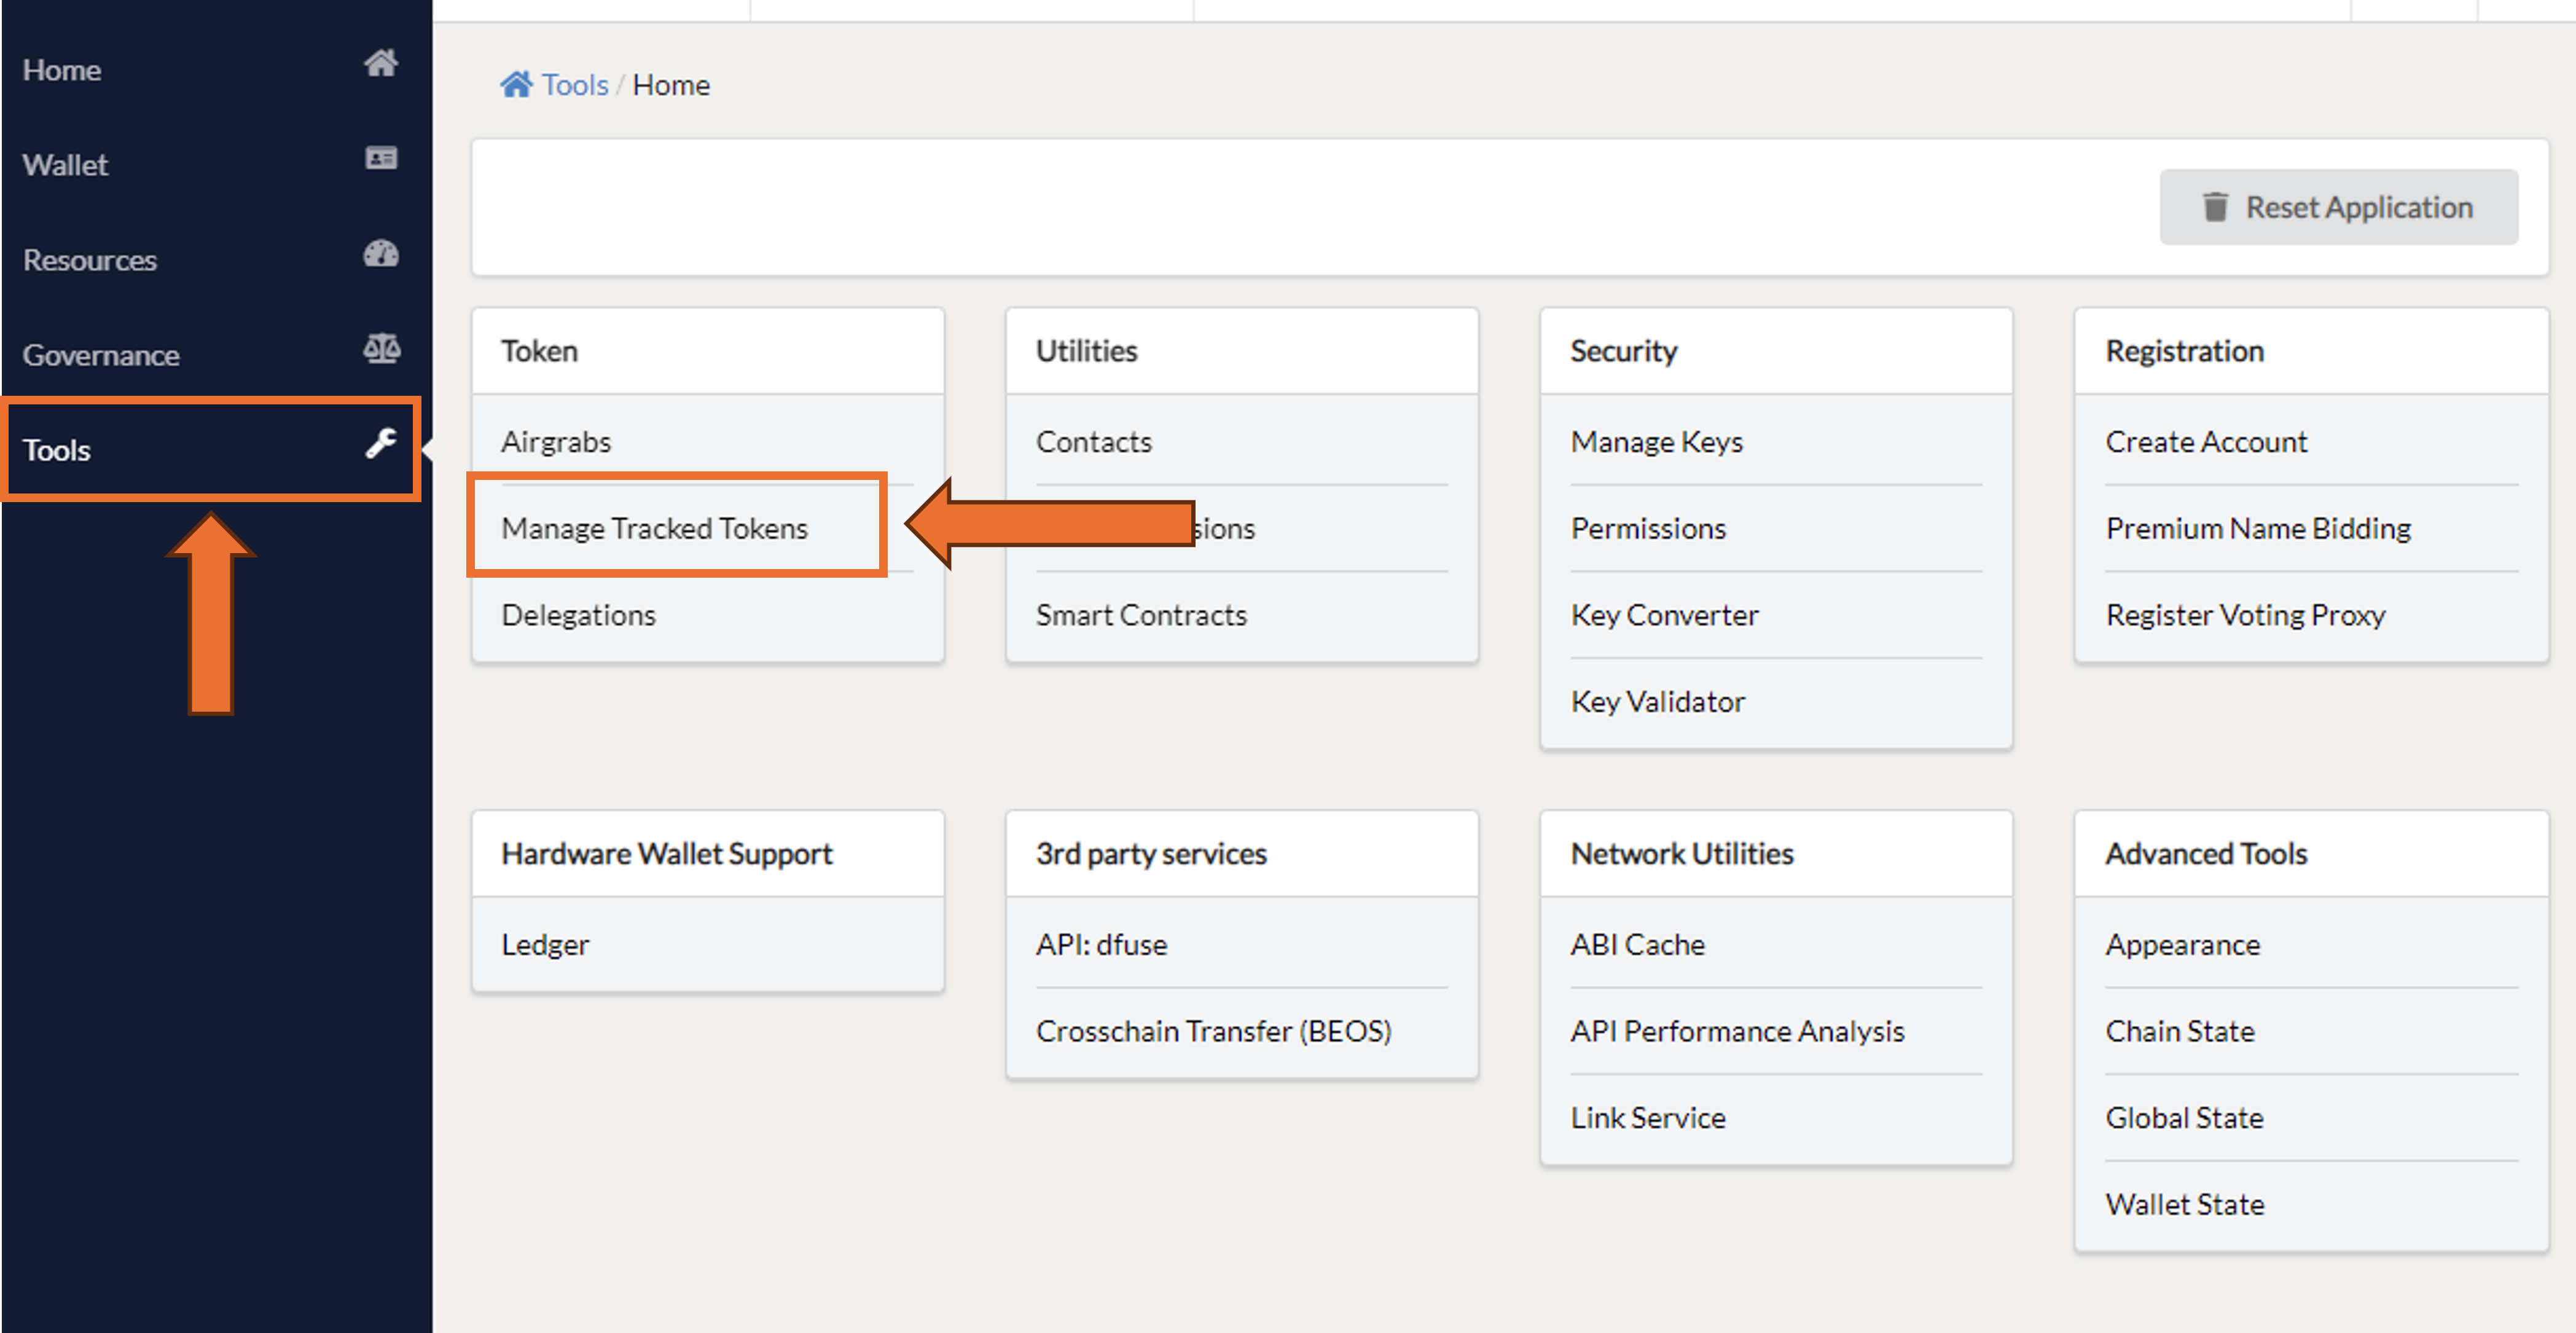 Fig 1. Anchor Wallet “Manage Tracked Tokens” Tool
Step 2: Add Custom Token
Look for and click the Add Custom Token button to start the process of integrating a new token into your wallet.
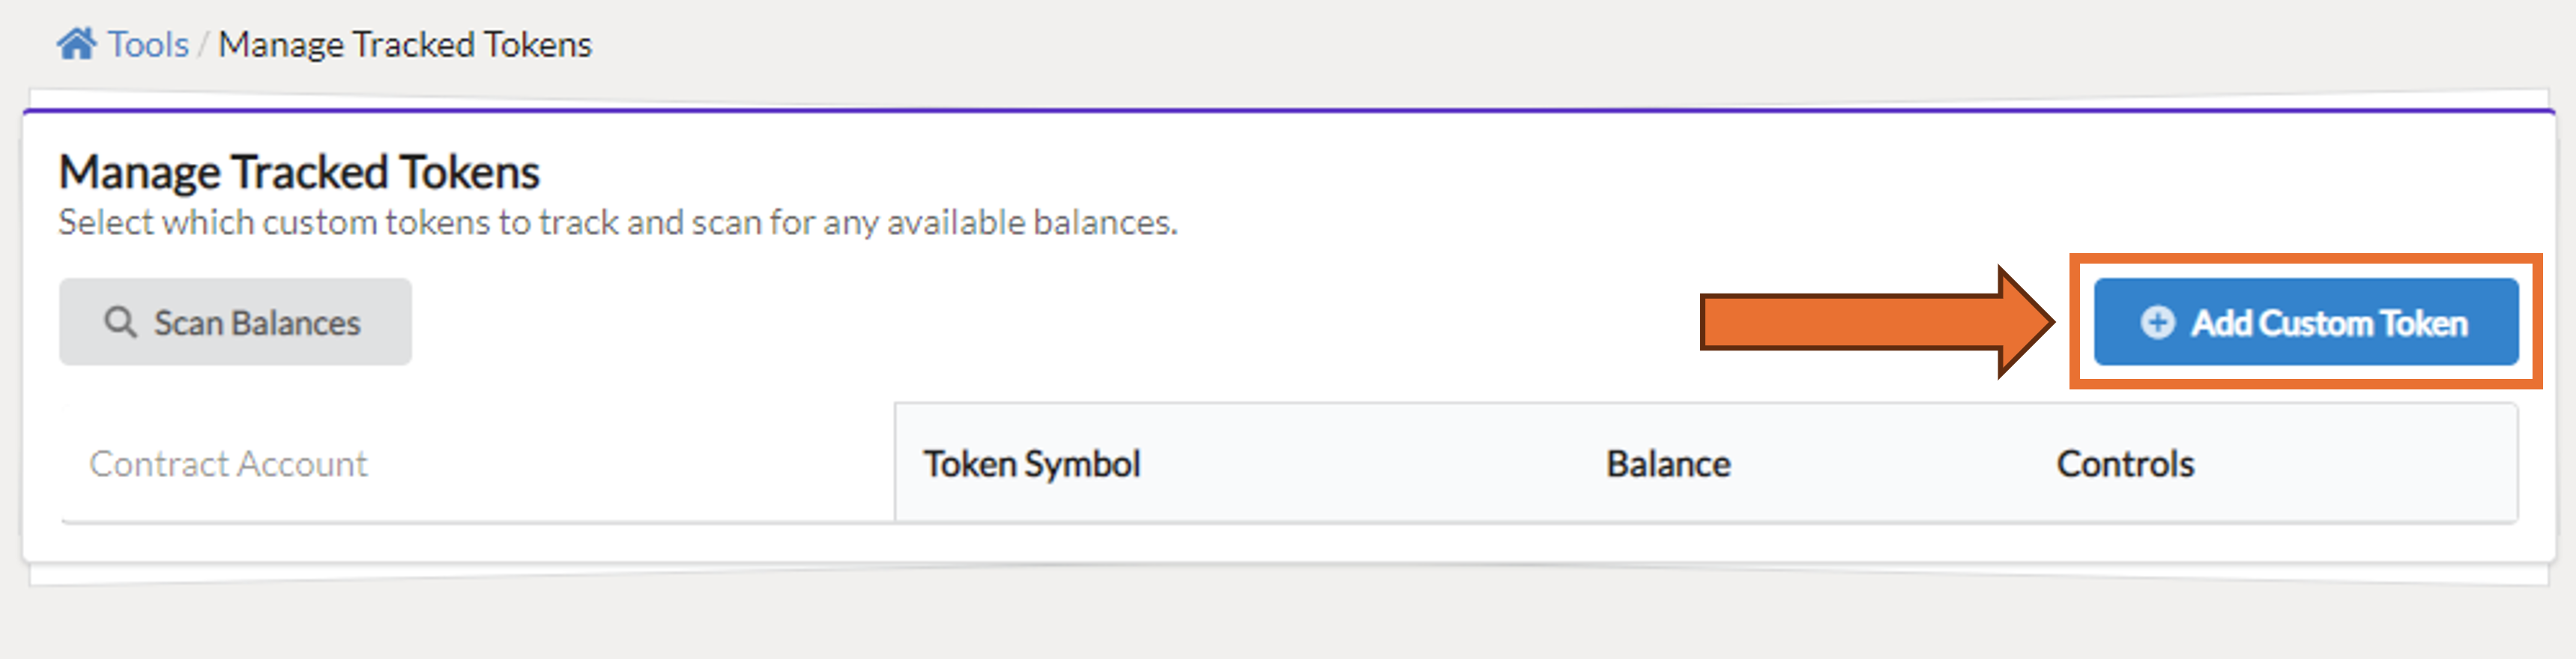 Fig 2. Anchor Wallet with no tokens tracked
Step 3: Confirm Token Addition
In the fields for Contract Account Name and Contract Asset Symbol, input eosio.token and KOYN respectively. Once filled, click on the Add Custom Token button to proceed.
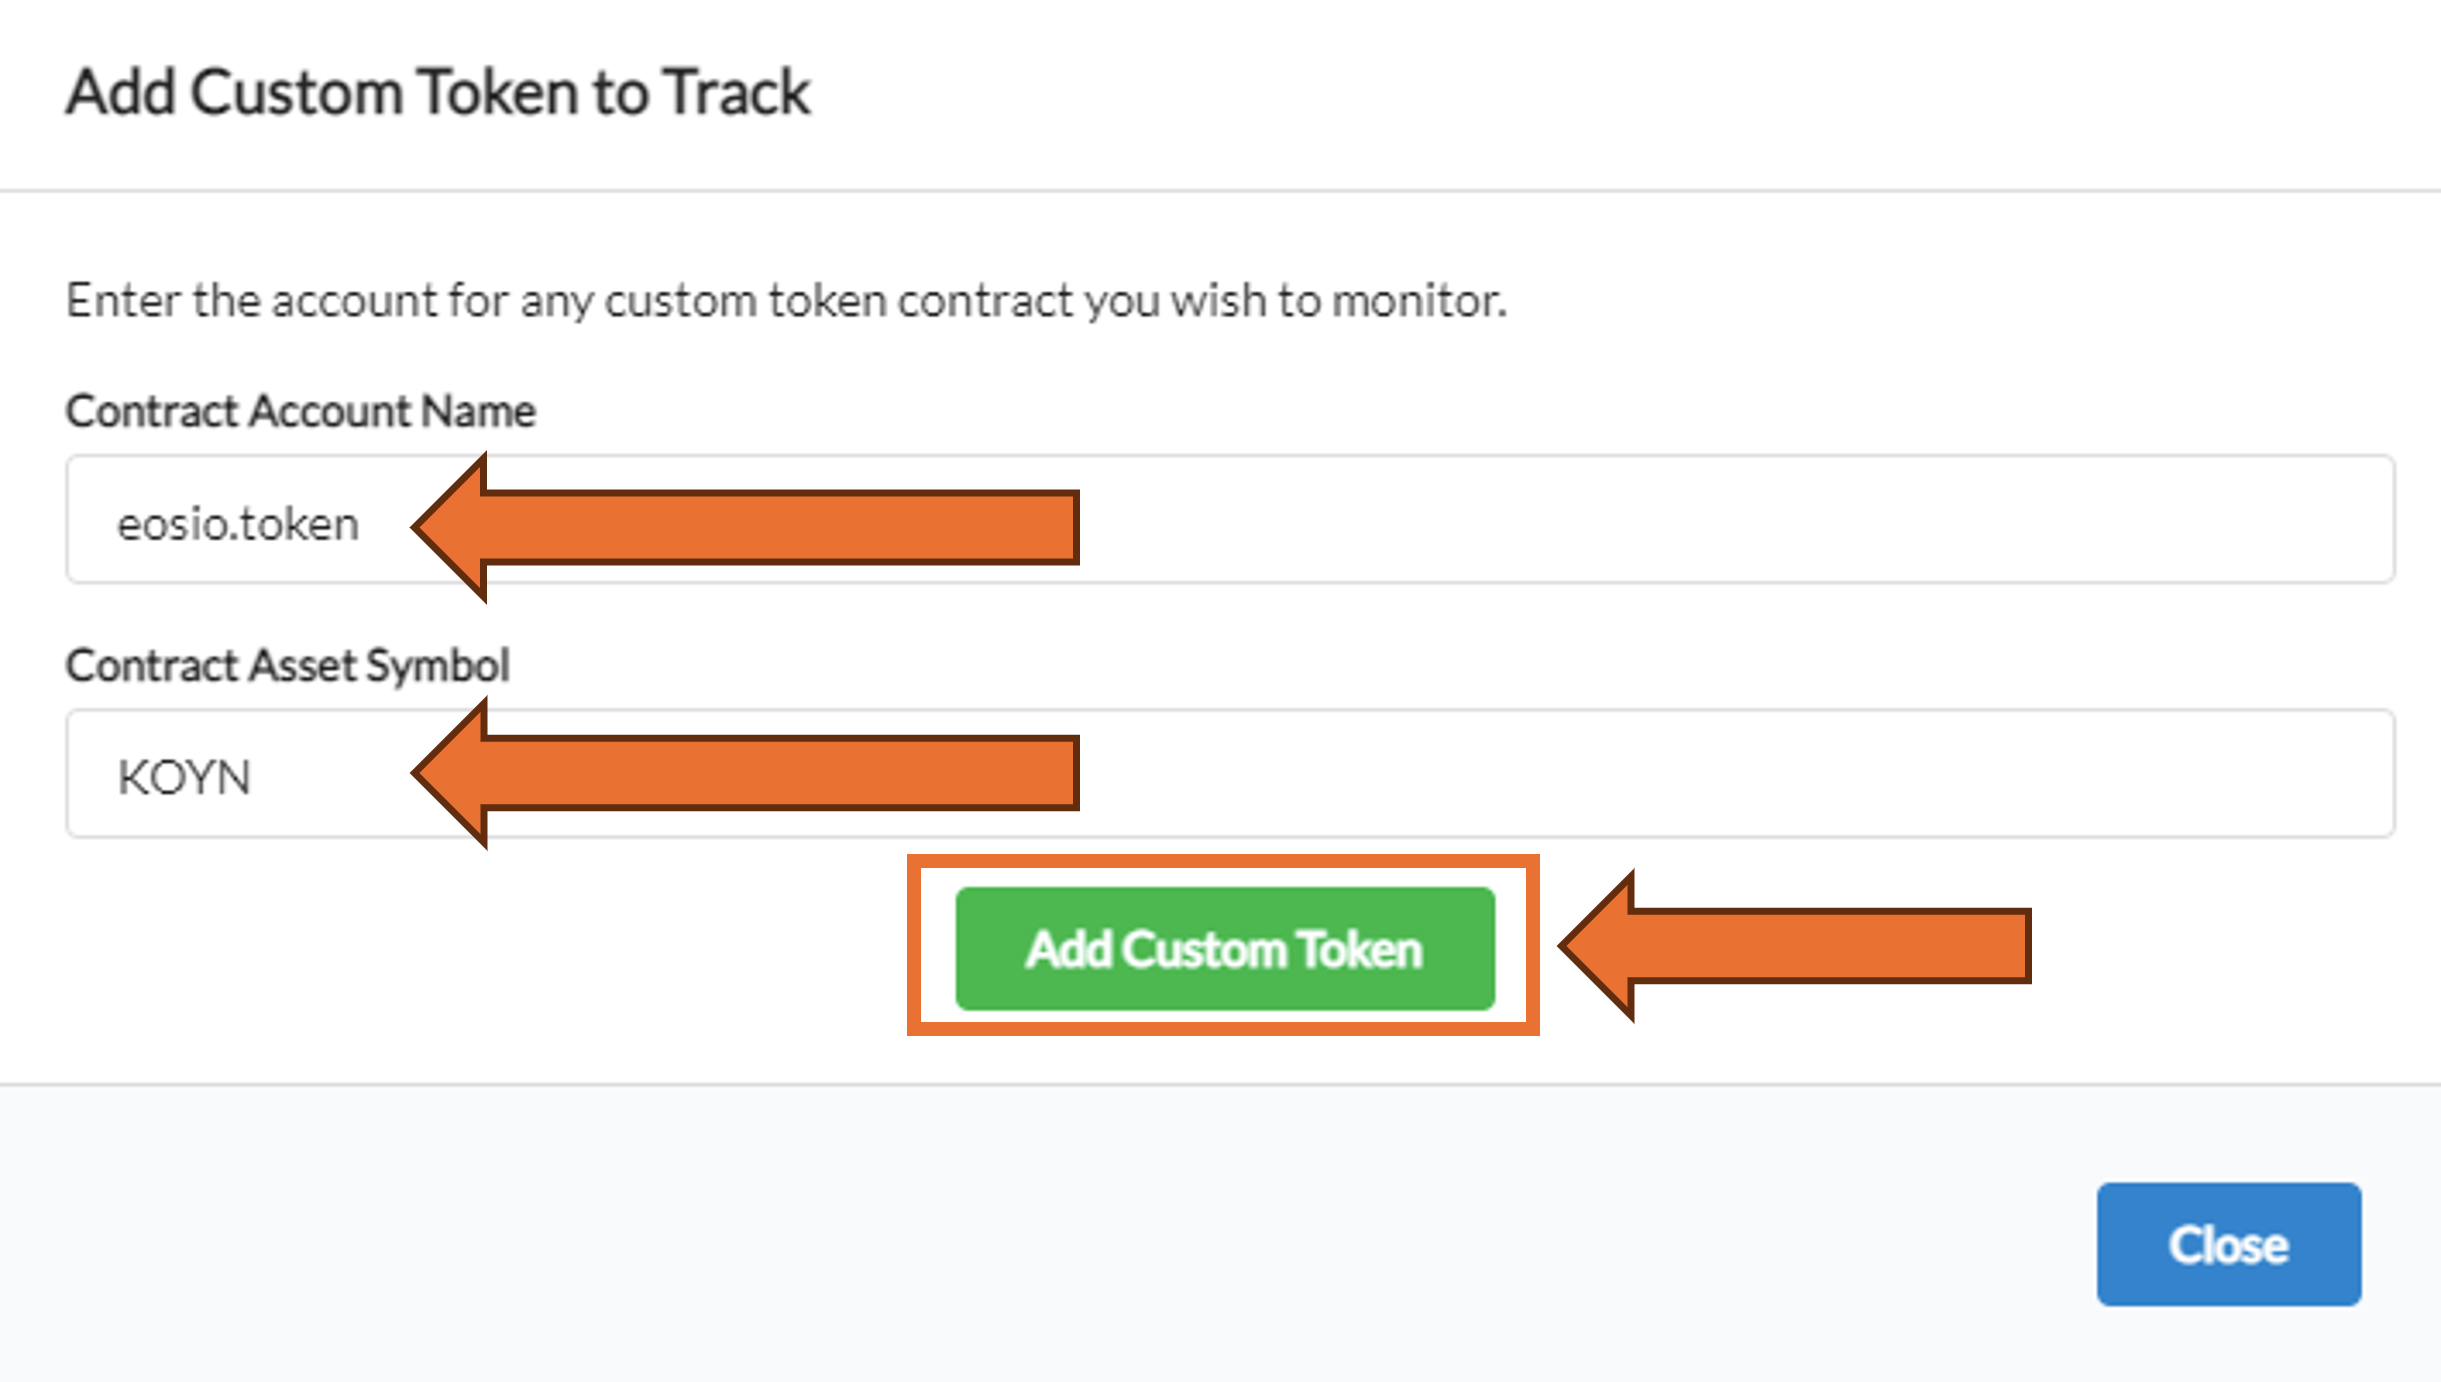 Fig 3. Parameters for adding KOYN token
Step 4: Confirm Token Addition
A prompt will appear asking you to confirm the addition of the new token. Click on the Confirm Token Addition button to finalize the process.
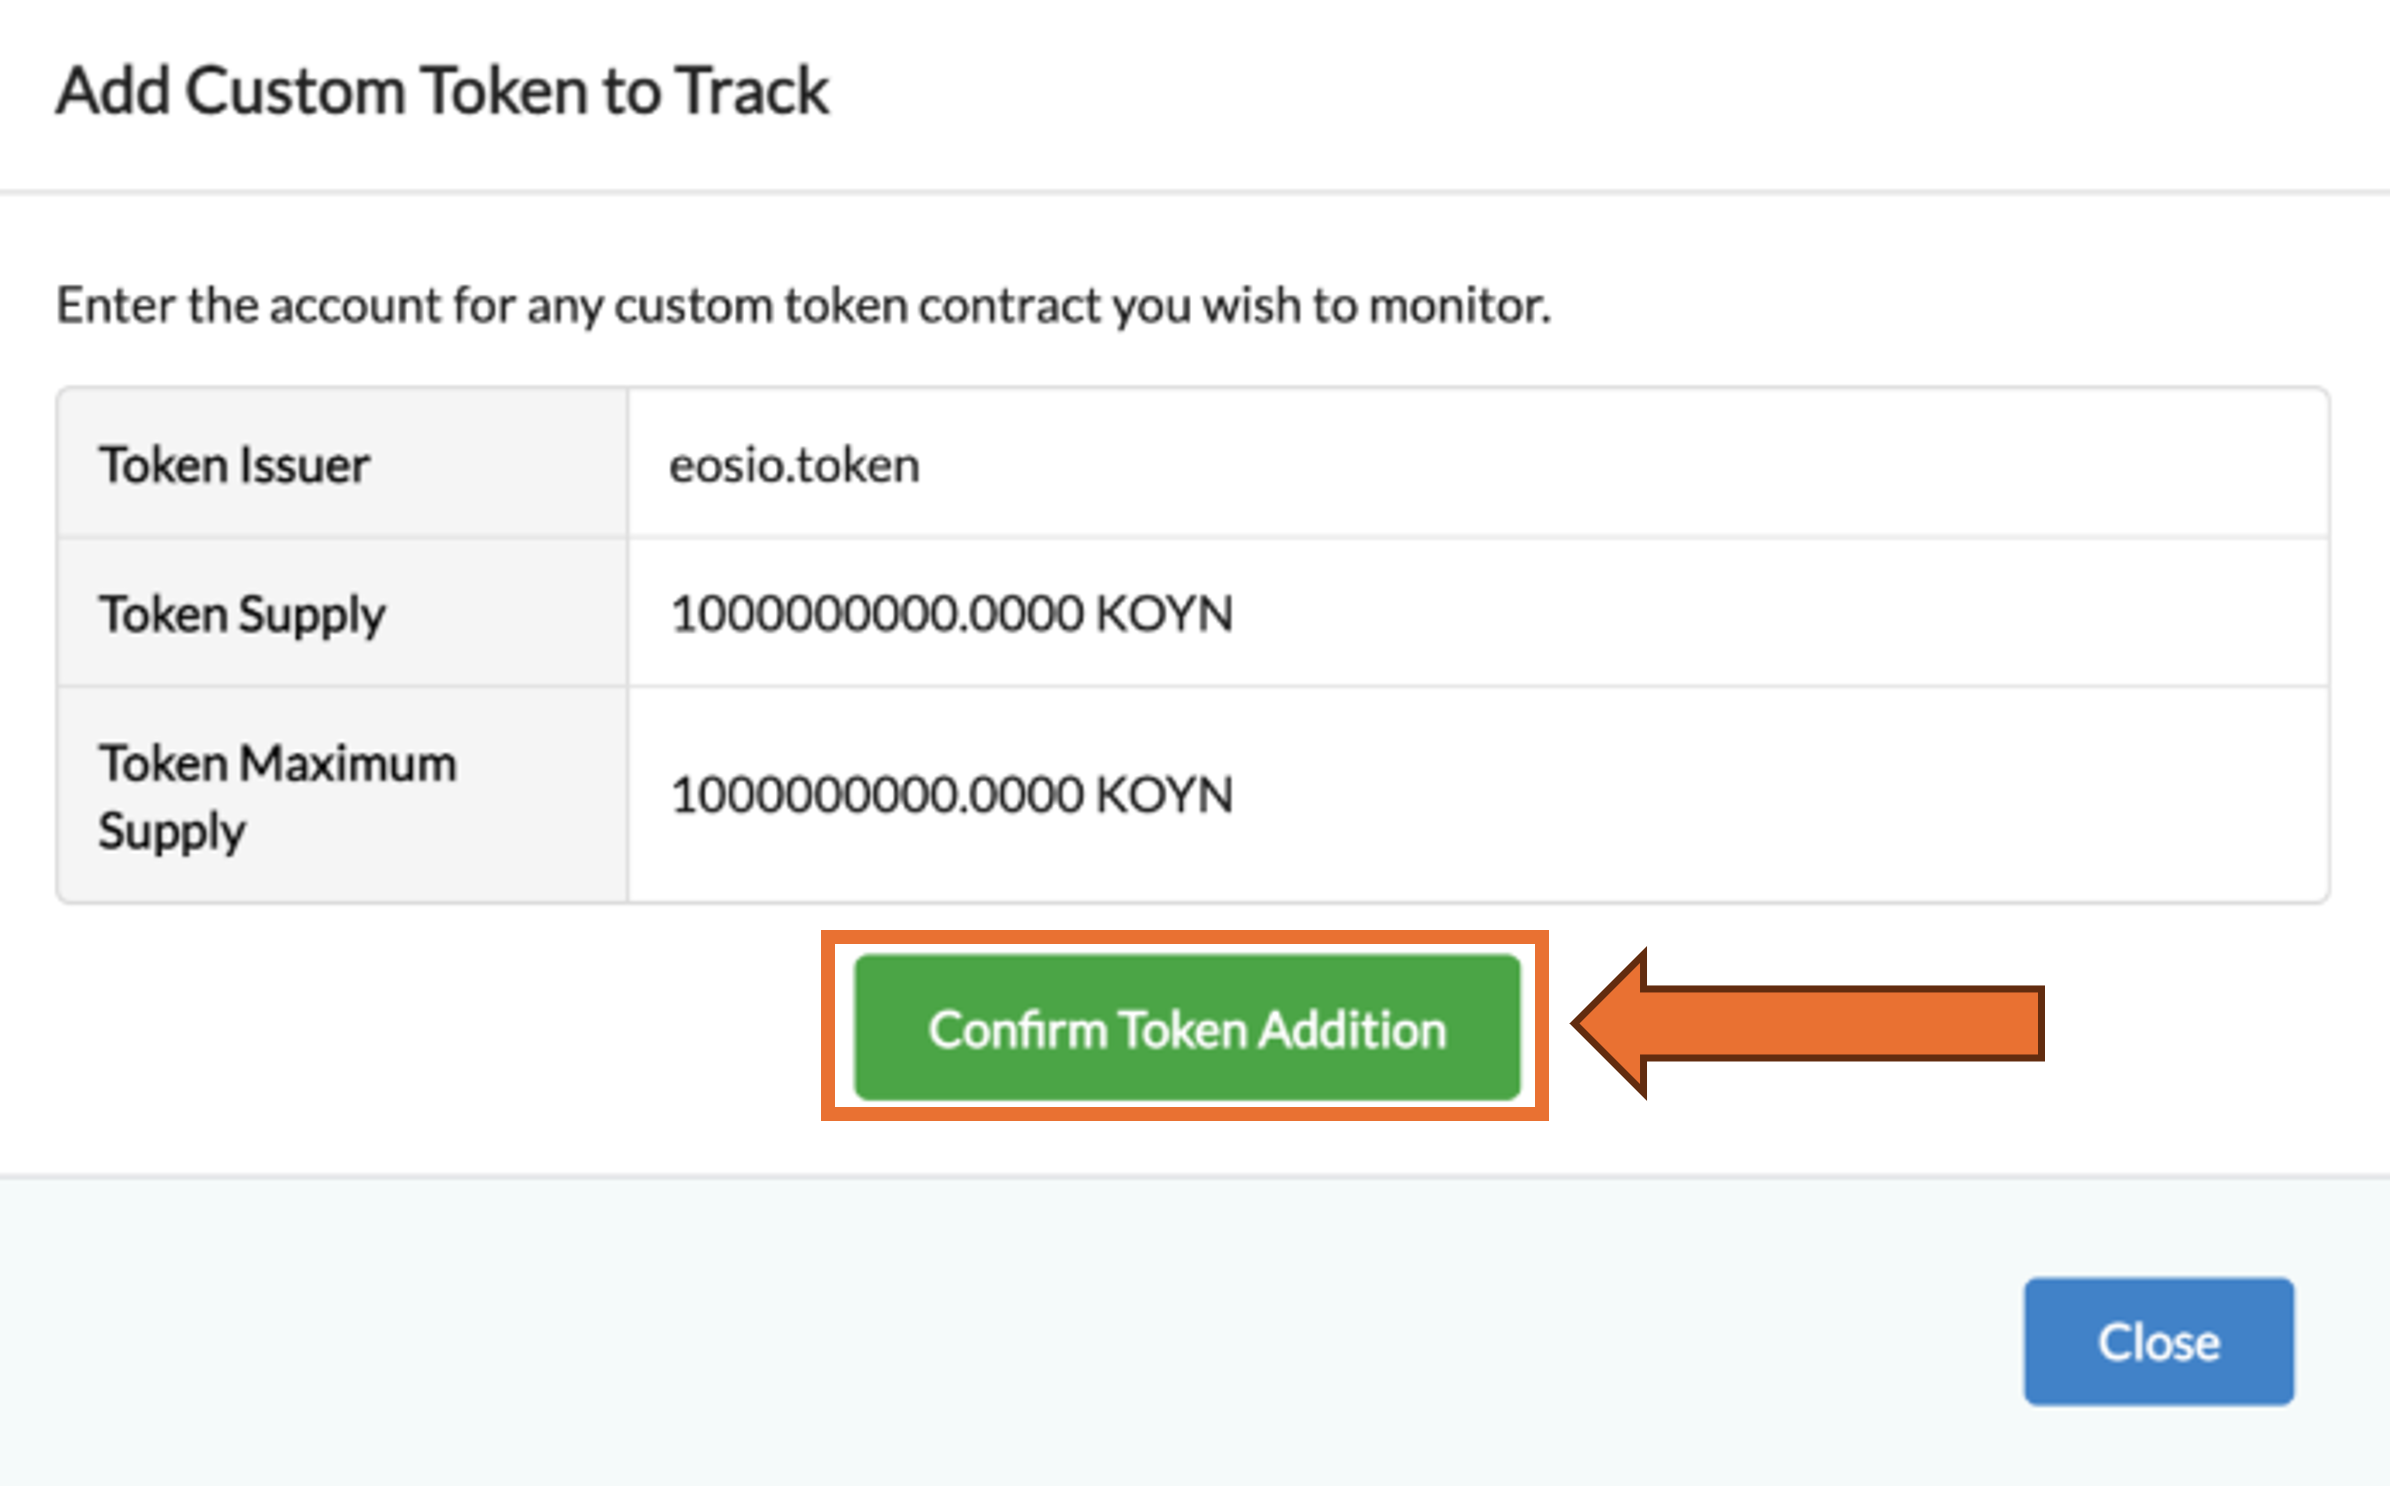 Fig 4. Add Custom Token Verification Screen
Step 5: View Tracked Balance
After adding the token, KOY Network will appear as a manually tracked balance in your wallet. Initially, your balance might display as zero since Anchor Wallet may not automatically show staked balances. For information on staked balances, refer to the KOY Network Block Explorer.
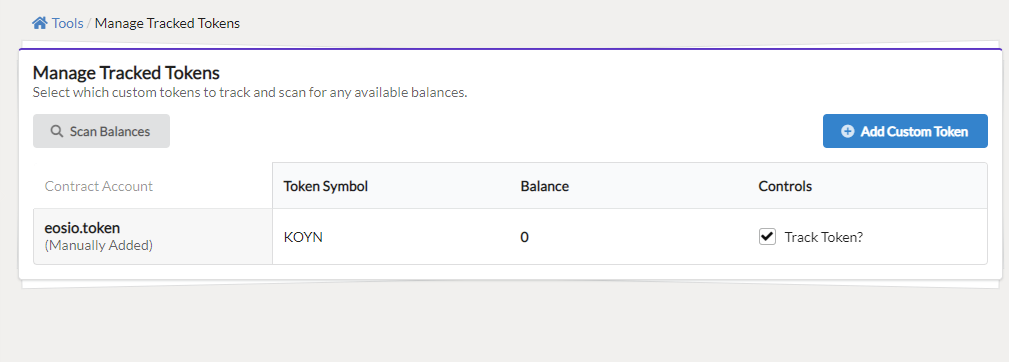 Fig 5. KOYN Token added
Step 6: Finalize Setup
Return to the Anchor Wallet Home screen by selecting Home at the top of the left-hand menu. Click on the Tokens tab to view your KOYN balance. If needed, press the Load All Balances button at the bottom of the page to update and display all your balances correctly.
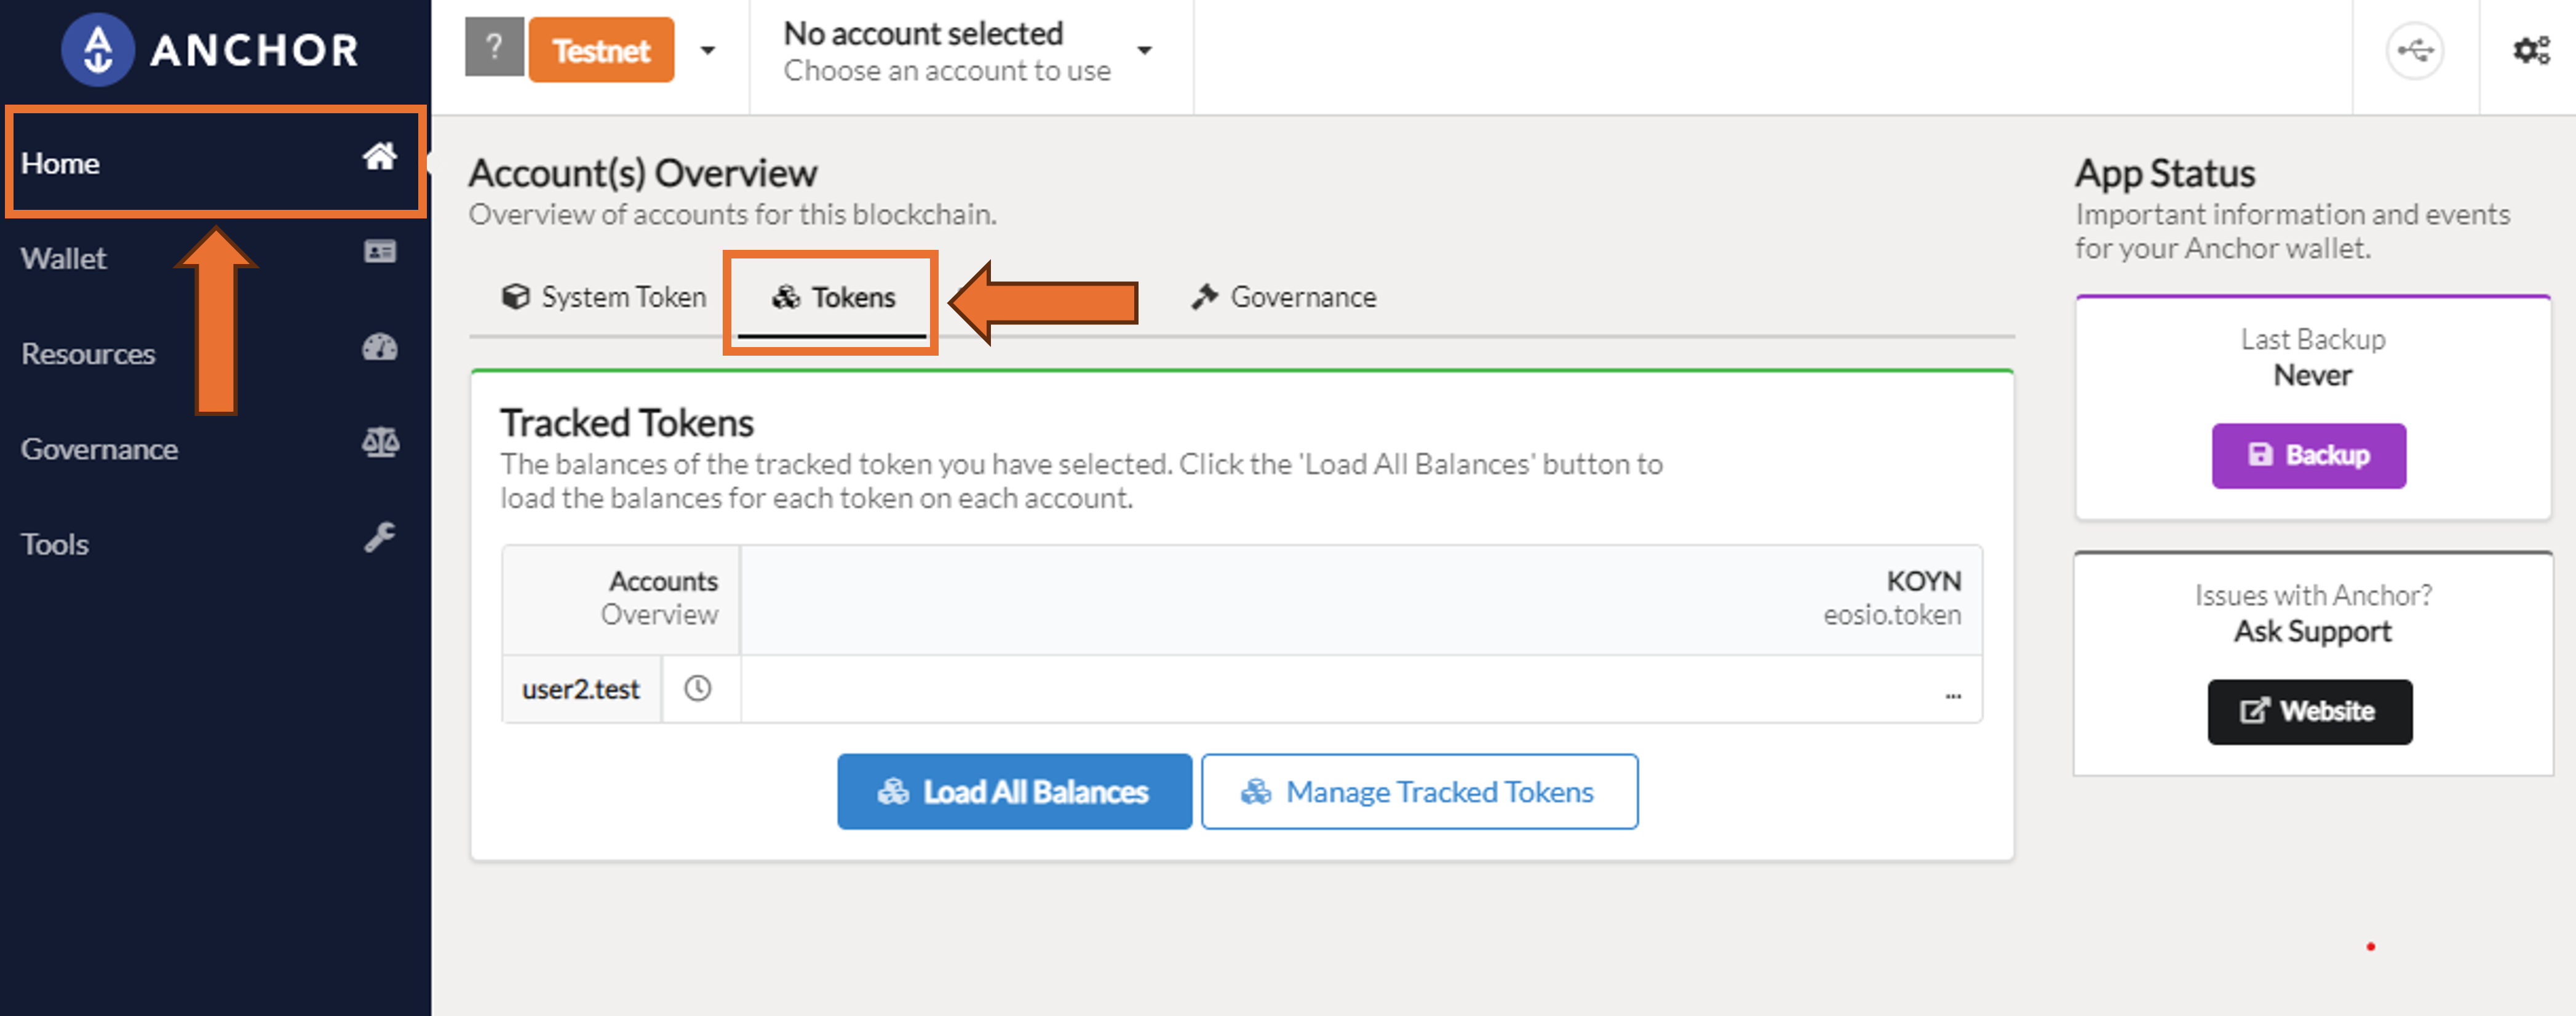 Fig 6. KOYN Token is tracked on KOY Network Mainnet